|
|
Programming |
[FrontPage Include Component] |
|
|
|
|
|
|||||
|
NAVIGATOR: Back - Home > Adi > Services > Support > Manuals > Aces > Dos : |
|||||
|
|
|||||
| |||||||||||||||||||
|
Programming
Categories
|
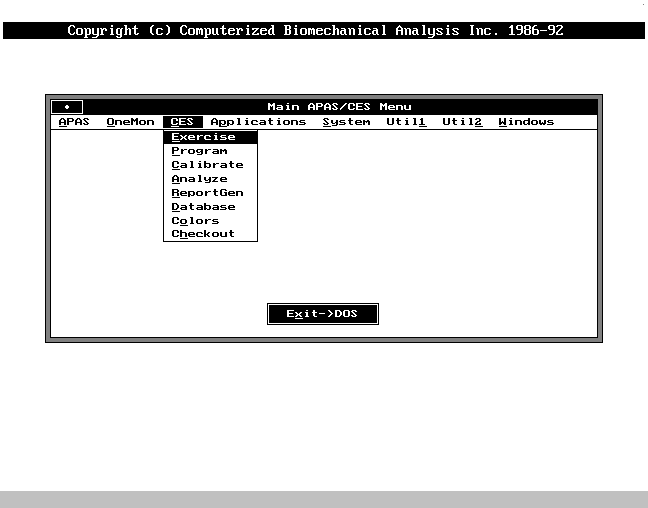
PROGRAMMINGThis chapter will describe the procedure for creating an individual exercise program. This procedure is called the Programming Mode. Please note that the Programming Mode is not a mode of exercise, but rather an "administrative" mode in which a file, containing a sequence of exercises, is created, to be subsequently performed in Exercise Mode. It is important to make this distinction because normally a user will exercise by performing an exercise sequence created by a trainer, coach, clinician, or therapist in programming Mode. To begin programming an exercise, select "Program" from the Exercise Menu and press "Enter". In the Select Program Mode several options will be given. The "User" option should be selected at this time. The User File menu will appear on the screen. The upper left hand corner will indicate in what drive the file will be saved. Drive A and B are for floppy drives. Drive D is the default setting where the files are automatically saved to the hard disc. To change drives, press F1 and enter your selection and press "Enter". Then simply highlight your choice and press "Enter". Your choice will appear in the drive field. Next choose either "New" or "Old". Either option can be opened by typing the first letter or highlighting with the cursor and pressing "Enter". "New" will let the computer know that a new file will have to be opened. "Old" should be selected when the user wishes to access a program which has already been created. This will bring up a list of file names. Highlight the desired file with the arrow keys or by moving the mouse and pressing "Enter". 6.1 Creating a New ProgramAfter selecting "New" and pressing "Enter", you will then be asked to Enter New Userfile Name.The maximum for the program name is eight (8) characters with no space in-between the characters. Once the user has entered a file name and pressed "Esc" or after a file has been retrieved, the user will be returned to the Select Program Mode window. Select Personal for the Personal Information menu. The arrow keys or the Space Bar will move the cursor to the various fields for personal information. The first two lines ask for the following information:
6.1.1 DiagnosticsThe user must decide if the program will require diagnostics and how often. These functions are explained in greater detail in paragraph 4.4.
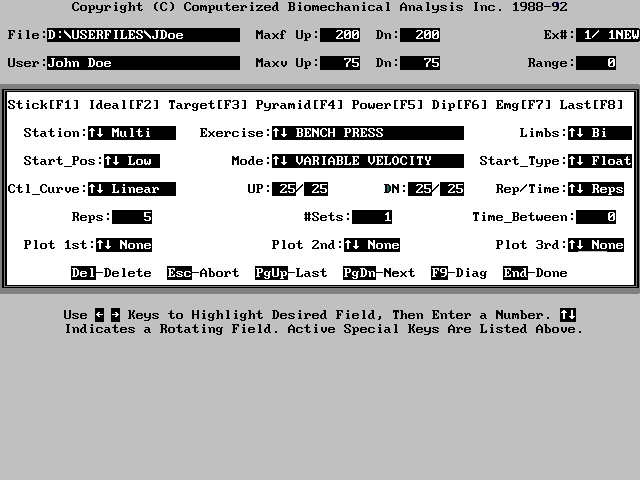
6.1.2 Diag_ExThe Diag_Ex performs the setting of the diagnostic values of Range, Speed and Force or any combination of the three.6.1.3 Freq_DiagFreq_Diag determines the frequency at which diagnostic evaluations are performed. A value of 10 entered would indicate that every 10 times the exercise is performed a diagnostic evaluation will be completed.6.1.4 #Data_SavesThe #Data_Saves determines the total number of exercise session results that are to be saved before a progress report is performed.6.1.5 Freq SaveTh Freq Save feature allows the user to determine how often the system is to save the results. For example, a user may want to record every other exercise to spread the results over a greater time period.6.1.6 Hard CopyHard Copy allows the user to control whether or not the screens from the program can be printed or not. Hard Copy allows the programmer to prevent copies being made by unauthorized persons.6.1.7 Pre.Ex.DelayThis feature determines the length of delay between different exercise. An inexperienced user of the CES may require a longer period of time to position themselves before the exercise begins, and may require 10 seconds or more. As they become more familiar with operating the CES the time can decrease to as little as 3 or 4 seconds.6.1.9 PacingThe CES can automatically pace the user through the set by selecting "Auto". "Self" allows the user to provide their own pacing time in seconds.6.1.10 Work SheetWhen work sheet is selected by indicating "yes", all results will be saved into a worksheet file. The CES Report Generation Module can then create the various reports and graphs. If "no" is selected it will not be possible to generate graphs and reports at a later date. The average curve data is saved into the user file. The EMG data must be saved in a separate file, which must be opened every time EMG data is needed.Once the parameters for the User Information have been set, "End" will return the user to the Program menu. 6.2 Creating the ExerciseFrom the Select Program Mode window select "Exercise", by typing "E" or by moving the cursor. This will bring you to the Exercise Parameter screen.When the Exercise Parameter screen. appears, default values will appear in the various fields. The arrow key allows for the selection of the various options within the Exercise Parameter Screen. If the user wishes to skip a field, they can do so by merely continuing the cursor to the left or right without scrolling up or down or entering another value. The various options in each of the boxes are accessed by scrolling with the up and down arrow keys. Remember if any changes are made to a field the "enter" key must be pressed to save the change. The two lines in the upper portion of the screen will show which drive the file has been saved to, the user's name, Maxf up& dn, Maxv up & dn, number of exercises, and Range of motion. 6.3 Exercise Parameters DisplayThe first line of the rectangular box offers eight Optional Parameters through the use of function keys, F1 to F8. The next four lines offer Basic Parameter option. The sixth line is the Plot line and the last line offers Utility Functions.6.3.1 Basic ParametersThe exercise parameters presented in a large box at the center of the screen includes the following options:6.3.1.1 Station.This tells the user what station they should be using for this exercise. Possible choices include Arm/Leg, Back and Multifunction.6.3.1.2 Exercise.The Exercise field includes 20 different types of exercises per station and may be changed by scrolling with the up/dn arrow keys and pressing "Enter" to save. The names of the exercises refer to the position of the exercise or the muscle groups being exercised: such as the bench press and pull, the inverted leg press, and curls/tricep extensions.6.3.1.3 Limbs.The limbs field refers to Bilateral or Unilateral (Right or Left limbs).6.3.1.4 Start Position.This is the starting position for the exercise. The low position is usually used in most exercises, starting in the down position, i.e., bench press, shoulder shrugs, military press, etc. The High position is used for exercises starting form the up position, i.e., squats, etc. These positions may be changed by the user.6.3.1.5 Mode.The exercise modes of the CES indicate how the exercise type will be controlled and how it will be measured (Section 4.1).
6.3.1.6 Start Type
6.3.1.7 Control Curve.This parameter determines the pattern in which the speed or resistance of the bar will be controlled and modified for both the upstroke and the downstroke. This parameter does not control each stroke independently.
6.3.1.8 Up and Dn.These two commands establish a modifier of the level of resistance for the upstroke and downstroke.6.3.1.9 Range.The value entered determines the range of motion. Normally, this value represents degrees of bar movement when in Calibration mode the Bar Measure Parameter is selected to be angular. When the Linear Bar is selected the Range value represents centimeters or inches of bar movement. Normally, you do not enter a value here, since the range of motion varies considerably from user to user and from exercise to exercise.When this value is set to zero, the system will automatically measure your range by asking you to perform one repetition without any resistance, before the exercise begins. This is the Autorange function and it is the normal way to operate in the Manual Mode. Once your range has been set it will remain the same until the type of exercise has been changed. To reset your range, without changing the exercise type, merely set the range value back to zero when you return to the exercise parameters display. In Programmed Operation Mode the range can be reset in the Diagnostic Mode. From that point on, the system will automatically check the user range before performing an exercise. 6.3.1.10 REPS.
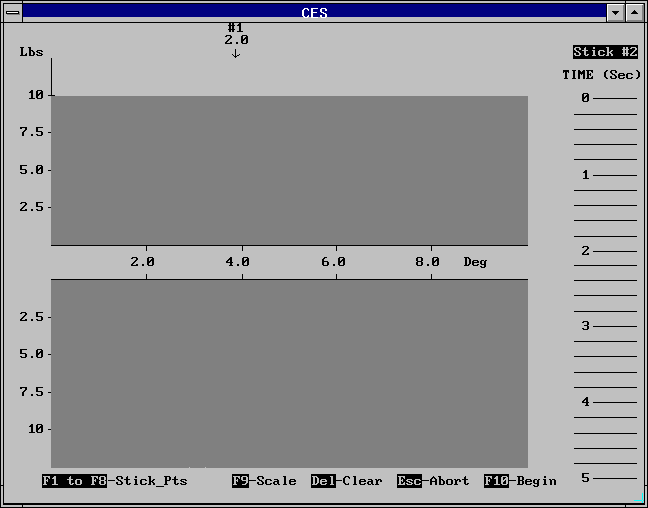
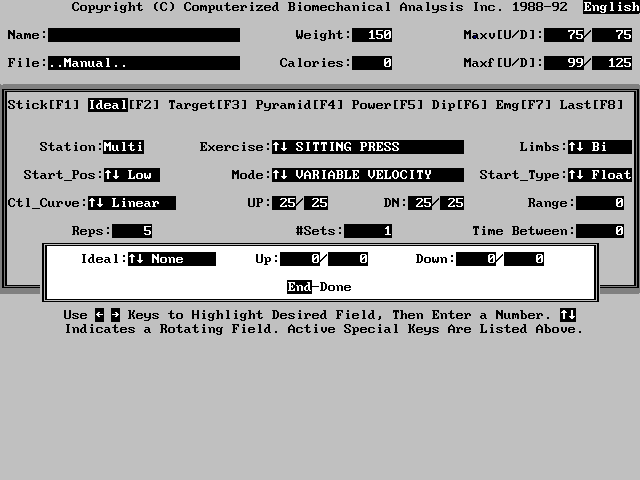
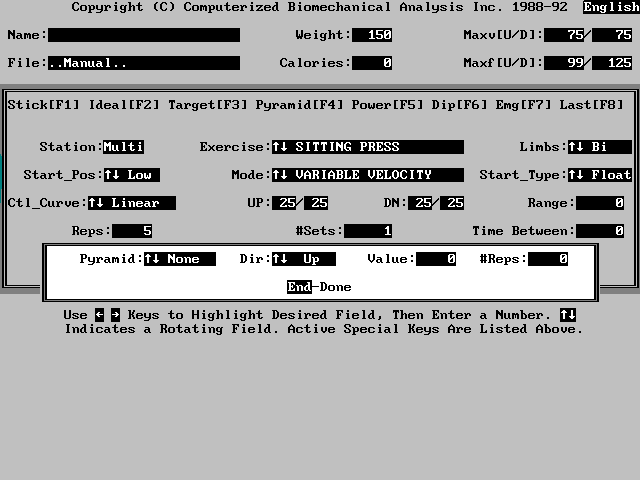
6.3.1.11 #SETS.This selection indicates the number of times an exercise is to be performed. In each set the control of the exercise will be identical to the one before.6.3.1.12 Time Between.This parameter indicates the amount of time, in seconds, that the user shall be allowed to rest between sets. Normally, this value is set to zero so that the user can signal with the mouse, keyboard or bar when they are ready to continue. This function can be applied to cardiovascular training.6.3.2 Plotting Previous SessionsThe Plot allows the user to compare the average curve of the user performance with the three previous performances.Plot 1st:, Plot 2nd:, Plot 3rd: - Each plot offers 10 different comparison curves. The first curve is form the exercise just performed, and the rest of the exercises are previous exercises that have been specified by the "Freq" option, which determines how often the results of workout session are to be saved. 6.3.3 Optional ParametersThe Optional Parameters F1 to F8 offer the following additional modifications on the selected exercise.6.3.3.1 Stick [F1].The Stick Point option allows the user to set an isometric sticking point or points within the range of the exercise. The sticking point is an effective method for increasing the strength at a particular point within a range of motion.The stick is activated by pressing the F1 key. The stick option will be highlighted and the diagnostic curve for the exercise will appear. A pointer will appear on the left side of the screen and the number 0.00 indicating the duration of the sticking points in seconds. Up to 8 sticking points can be selected by pressing F1 trough F8. The mouse is used to select the desired sticking point for the exercise. Once the pointer has been placed, press "Enter". Then move the cursor to the time scale, located on the right side of the screen and select the desired time and press "Enter". The unit measurements on the scale are in tenths of a second. Once you have set your sticking point(s), press the "End" key. 6.3.3.2 Ideal [F2].The Ideal Curve will appear next to the user's average curve to serve as a comparison for the user to gauge their performance. The ideal curve can be based on data from population standards, normative data, and performance information. The ideal curve can be Linear and Exponential.Once F2 is pressed, a window will appear along the bottom of the screen. The programmer must enter the maximum and minimum levels for the exercise. The ideal function calculates all the points for the curve. 6.3.3.3 Target [F3].The Target Function allows the user to set a target for the upstroke and the downstroke. The value for the exercise is indicated by a gold bar located above the average and max bars for the exercise. When the user achieves the target value for each repetition the average and maximum bars will cross the gold bar indicating the Target value. Only one value can be entered for the upstroke and the downstroke. This is a motivational feature and it does not change the function of any mechanism.The user must select "YES" option and press "Enter" in order to activate the Target option. Then numeric values are entered. 6.3.3.4 Pyramid [F4].The Pyramid Function allows the user to program in a variation of speed or resistance from repetition to repetition within the exercise. (It can be set up for downstroke or upstroke to perform independently). This program allows for the possibility of a warm up and a cool down period to be programmed into the set. Pyramiding is primarily used for training and not for diagnostics, because it introduces too many variables within a set. The amount Of \f change can be made by adding or subtracting a fix value, or a present value form the initial speed or resistance parameters. It is important to set the initial speed or resistance factors correctly in order to avoid a situation where, after a certain number of repetitions, the resistance becomes too heavy or the speed becomes too slow to overcome.Press F4 to enter option. Use up/dn arrow to scroll through options, which are in %, + or -, and press "Enter". Next select direction of pyramid, up, down, or both, again and press "Enter" to save. Enter the Value in speed or resistance that is to be added or subtracted. Then type in the number of repetitions. 6.3.3.5 Power [F5].The Power option allows the user to get the results of the exercise in units of Power (Power = Force x Velocity) rather than in units of force or velocity. Variable Velocity reports in units of force and Variable Resistance reports in units of velocity, but the Power Function actually allows for the automatic calculation of the functional strength, or force as a function of the speed of movement. The CES is the only machine that can control and report speed and velocity.The F5-Power function is only a toggle switch. Press the F5 key to turn it on and F5 again to turn it off. The POWER function is active when the F5-Power option is highlighted. 6.3.3.6 Dip [F6].The Dip Function provides the user with the opportunity to perform "Pull-ups" or sets of isometric contractions at selected angles by allowing the bar to be locked into position. When the bar is locked into position the CES does not perform any measurement or control functions. The Dip function has no time limit. The system has a safety feature that will not release the bar as long as there is any force applied to it.F6 is a toggle switch like F5. 6.3.3.7 EMG [F7].The Electromyogram (EMG) option allows data collections from 1 to 4 channels during exercise. The electrical activity is recorded during the actual exertion phase of the exercise. The EMG is integrated in real time with force, velocity, and displacement curves to analyze data. The EMG signal can be saved into a file and be further analyzed utilizing the Optional Data Analysis Module. After pressing F7 you need to select "YES" and press "Enter" to activate the EMG option. Then, it is required to specify the number of channels used to collect data. The EMG function allows you to select the period in the set when the system should collect EMG data. "Time" specifies how long from the beginning EMG data collection starts. "Work" specifies the amount of fatigue needed before EMG signal will begin recording. The CES is capable of storing EMG and Rehab data for five minutes after the exercise is stared.6.3.3.8 Last [F8].The Last Option allows the user to compare the results of a previous set with the results of the last set by displaying the average curve of the last set with the average curve of the present exercise. It is important to remember that the comparison given by the Last function will not differentiate the units of measure from the last exercise to the previous set, so the user must be sure to exercise in the same mode, i.e. when exercising in Variable Velocity for the first exercise, interpret results in accordance with curve values. The Last function is extremely useful in comparing the left side to the right side, upper body to lower, or speed to strength. |
|
|
