|
|
System Intro |
[FrontPage Include Component] |
|
|
|
|
|
|||||
|
NAVIGATOR: Back - Home > Adi > Services > Support > Manuals > Apas > Dos : |
|||||
|
|
|||||
| |||||||||||||||||||
|
System Intro
Categories
|
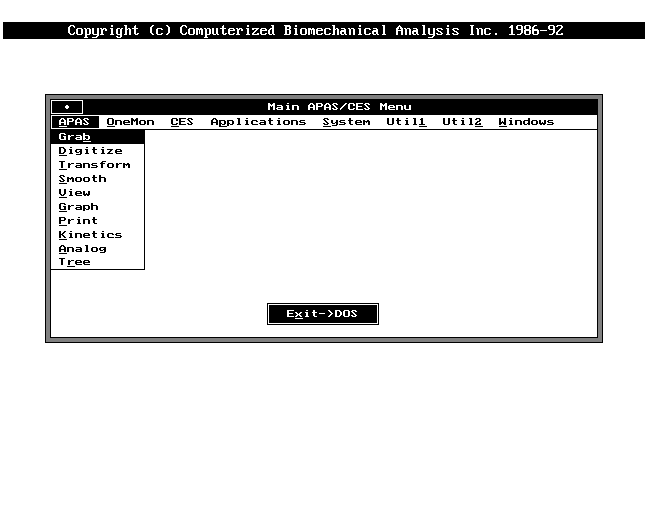
APAS HARDWARE4.1 COMPONENT SET-UP In set-up for the APAS it is recommended that a Power Surge Protector and Voltage Regulator be used between the system components and the power source. Connect a multiple outlet power strip to the power regulator and then plug all the component's power cables to the power strip. This arrangement will not only protect the components from power surges but also simplifies the "Turning On" procedure. All the component power switches may be left in the "On" position and the power strip switch may then be used for turning the computer system on and off. It is also recommended that components, not used for long periods of time, such as the VCR or printers, be left turned off until needed. A description for connecting the components of the APAS can be found at the end of Chapter 2: The Connections for the APAS Components. 4.2 SOFTWARE SET_UP Regardless of the hard disk space available, the APAS software is divided between three logical hard drives: C:, D: and E:. The C: drive is used to store the Ariel programs, memory management software and several utility programs. This drive should be considered "off-limits" to the user. Any modification to the C drive could corrupt existing files and result in a system failure. This includes additions of new files or directories, editing existing files or deleting necessary files. The D: drive is used to store third party programs and digitized data files from the APAS modules. Specific directories should be established by the users to store their data on this drive. It is often helpful to create directories with the associated activities. For example, create the directory GAIT to store gait analysis files, Golf_1 to store golf analysis of subject 1 etc. The E: drive is used to store the video images captured during the Grab module. The .vid extension is automatically added to the grabbed video files. If additional room is required, this drive can also be used as an extension of the D: drive, however, you should be aware that additional data on the E: drive takes space away from the available space for grabbed images. 4.3 MENUS The APAS modules are accessed through the pulldown menus (Figure 4-2). The menus of each module will appear on the monochrome screen when using the two monitor mode and the color screen when using the one monitor mode. In the two monitor mode, the color monitor is used mostly for video images and viewing of the digitized stick figures. The menus present a list of options, functions or modes that may be performed at that time. The first line of the menu is the menu title. The second line is the menu itself, consisting of two or more individual items. Some of these functions are actually performed in order, one right after the other. The third line of the menu is a brief description of the highlighted item to aid in selection. Selecting an option from the menu can be done by either typing the first letter of the option or by highlighting the option with either the arrow keys or the mouse and then pressing ENTER. Either procedure yields the same results and is based on the comfort level or preference of the user. 4.4 PRINTING SCREENS If at any time the user wishes to print a screen, pressing the CNTL and PRT SCR keys on the keyboard at the same time will select the [Print Screen Menu]. The Print Screen offers the following options:
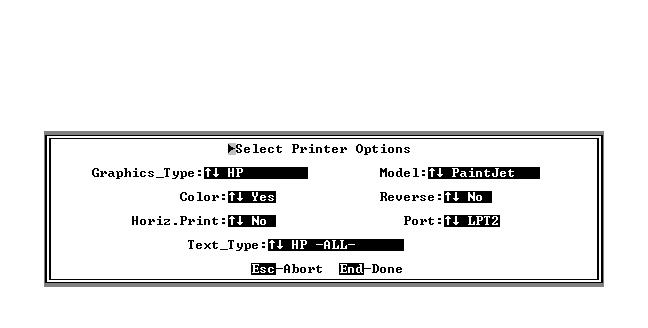
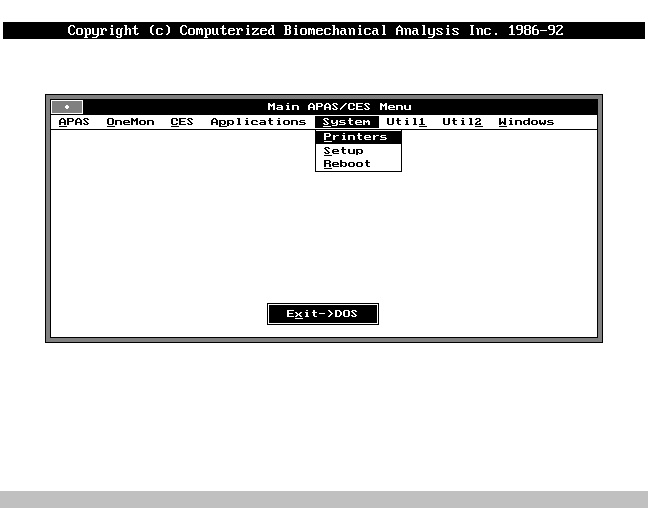
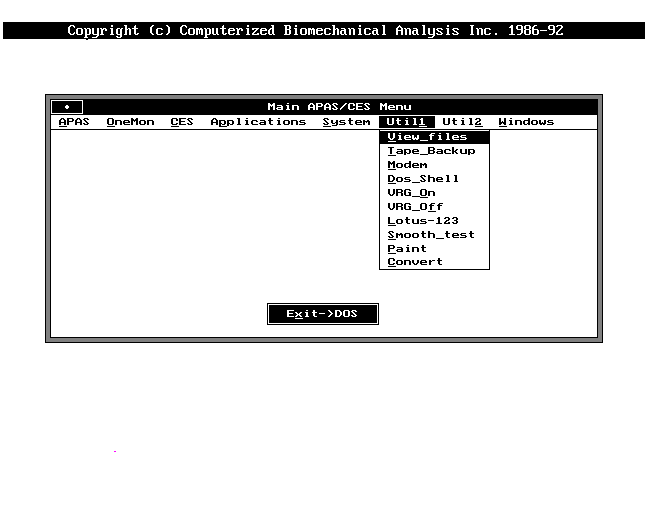
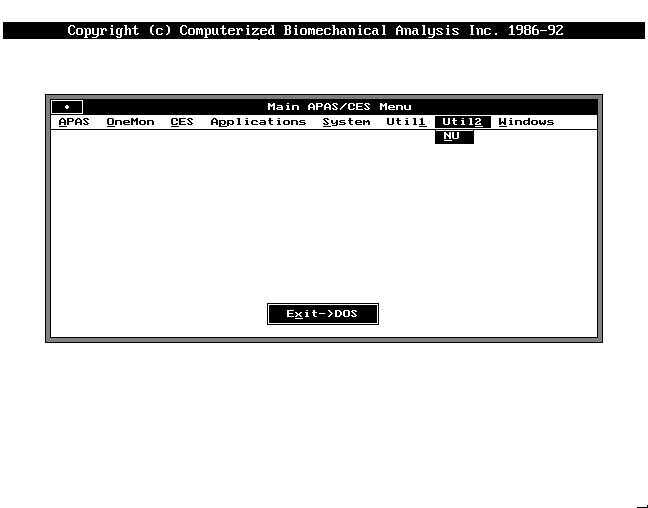
The Exit selection from this window will take the user to the Disk Operating System (DOS). 4.5.1 APAS The APAS Menu lists the modules that comprise the Ariel Performance Analysis System. The modules are arranged in the order that they would generally be used when performing a new analysis. The following chapters describing each of the individual modules will begin by accessing the particular module from this window. 4.5.2 OneMon The OneMon menu allows the user to select Ariel Performance Analysis System modules in a one monitor mode. APAS modules selected under this option do not require use of the monochrome monitor. The menu screen that is displayed on the monochrome monitor in the two monitor mode can be accessed in the one monitor mode by pressing the INSERT key on the keyboard. Menu selections using the One Monitor mode are identical to the two monitor mode, however, the appearance of menus may vary slightly. 4.5.3 Application Under the Application Menu is a listing of the special Ariel programs. These are specialty programs and are designed as aids to the APAS analysis. 4.5.3.1 DELTA The Dynamic Ergonomic Lift Task Analysis (DELTA) program is a special application program developed around the basic APAS for movement analysis. The DELTA program is based upon the lifting model presented in Don Chafin's text, Occupational Biomechanics. This model is concerned with the biomechanical and static strength capabilities of the employee in relation to the physical demands of the work environment. Ariel has added to this model the inertial effects of load to help provide more accurate results in the DELTA program. This program was designed to help the analyst in the evaluation of the physical demands of a prescribed job and to evaluate proposed workplace designs in order to implement the necessary changes prior to the construction of that work station. The information derived from the analysis is useful for job design and as an evaluation tool for instructional purposes. Since the information is collected in two dimensions, it is applicable only to the worker's movement in the sagital plane. The DELTA program is an optional program and is not installed with every APAS system. This program is discussed further in Chapter 15, DELTA - Dynamic Ergonomic Lift Task Analysis. 4.5.3.2 Gait The Gait program was created with the intention of providing kinematic and timing characteristics of sagital gait movement. It also serves as a general instructional tool on improving gait movement. The program provides the ability to easily compare results with a specified data base. The special characteristics of the Gait program gives the orthopedic surgeon and the clinician the capacity to see how a patient is rehabilitating or recovering from surgery. The Gait program is an optional program and is not installed with every APAS system. This program is discussed further in Chapter 16, The Gait Program. 4.5.3.3 RPI2D The Redundant Point Interpolation 2-Dimensional (RPI2D) program is used in conjunction with the Gait program. It is based on the fact that in 2-dimensions you can define any segment with three points. By knowing the relationship of each of the three points to the other two, if any one point is not visible, the location of the missing point can be computed from the known location of the remaining two points. For example, in a sagital gait analysis, the thigh can be defined by one point on hip, one point on the knee joint and a third point on the posterior surface of the thigh (somewhere between the first two points). When the hip joint is blocked by the swinging arm, the location is "estimated" while digitizing. The RPI2D program is then used on the digitized image to compute the exact location of the "estimated" points. This has been shown to significantly increase digitizing accuracy. 4.5.3.4 Anthro The Anthro program is a calculation module using formulas based on abstracts of various investigations. This module calculates values of segmental mass, location of center-of-mass (CM), and principal moments of intertia with respect to the CM. 4.5.4 System Programs dealing with global system parameters are filed under the Systems menu. 4.5.4.1 Printers When the Printers option is chosen the Printer Option Screen shows the type of printer that has been selected. The first six fields pertain to the graphics printer. The "Text_Type" field is used to select the text printer. The APAS is compatible with a multitude of different printers. The APAS supports 2 line printer ports (LPT1 & LPT2). By default, the color graphic printouts are routed to LPT2 by the "CTRL" & "PRT SCRN" command. Table and numerical data are routed to LPT1. 4.5.4.2 Setup The Setup Information menu is used to set global parameters for use by the APAS. These parameters are set prior to delivery of the system. The default force plate file can be selected for use in the Analog module. Resolution can be set to the user's preference. The VCR type should be selected to correspond to the VCR used with your particular system. NOTE: The Panasonic AG-7150 and AG-7350 use the same PAN7350 setting. 4.5.5 Util1 This is the system Utilities 1 menu (Figure 4-8). This menu provides programs for manipulation of files, general disk maintenance and other various programs.
4.5.7 Windows The Windows selection allows the user to run Microsoft Windows 3.11 operating environment. 4.6 HELP SCREENS The Help Screens are accessed by pressing the SHIFT & QUESTION MARK (?) keys within any of the APAS modules. The Help screen offers a more detailed description of an items on the currently displayed menu. The Help Screen will overlay the current menu and will explain the menu items. Different menu items help screens are accessed using the left/right arrow keys. The help screen may be removed by pressing the ESC key. |
|
|

![[Print Screen Menu]](images/fig4_1.gif)