|
|
Lesson 1 |
[FrontPage Include Component] |
|
|
|
|
|
|||||
|
NAVIGATOR: Back - Home > Adi > Services > Support > Tutorials > Apaslite : |
|||||
|
|
|||||
| |||||||||||||||||||
|
Lesson 1
Categories
|
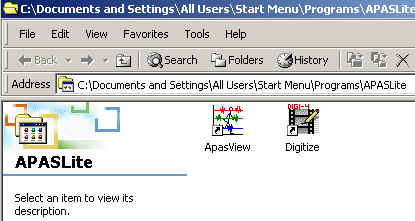
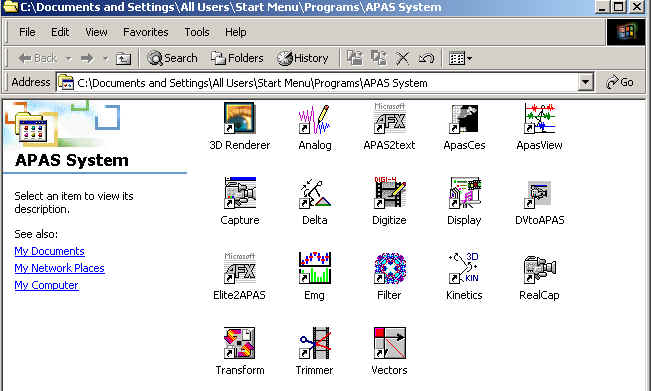
Lesson 1In this lesson you will be introduced to APAS/Lite (AL) Modules. Figure 1 illustrates the APAS/Lite modules on your desktop:
Figure 1. The first screen in APAS/Lite As you can see there are only two icons APAS/Lite folder in contrast to many more icons with the regular APAS. The reason is that most of the analysis functions are integrated into the Digitizing Module. The Digitizing Module includes the Transformation, Filtering and the APASView software modules. The APASView module is used to display the analyzed data, and is also integrated into the Digitizing Module. The APASView icon has been added as a separate icon so it is possible to go directly to the APASview to display data rather then getting into it from the Digitizing Module. However, you must analyze the raw data first to be able to display results in the APASView program. Double-click on the Digitize Icon and you will see the following display:
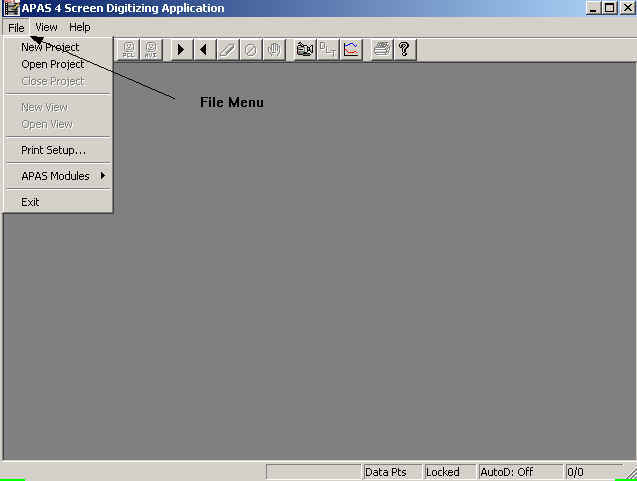
Figure 2. Pressing the Digitize Icon display From this menu you can choose few options. In our case we will start a new project. Figure 3 illustrates the various options:
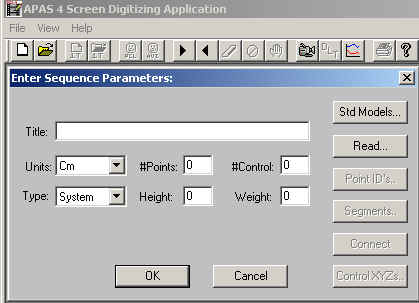
Figure 3. The "File" menu You may start a new project. Open existing Project, Print the setup or if you received a site key for the rest of the Full APAS you can run any of the APAS modules. In this case we will start a New Project. When you click on the New Project you will see the following Menu:
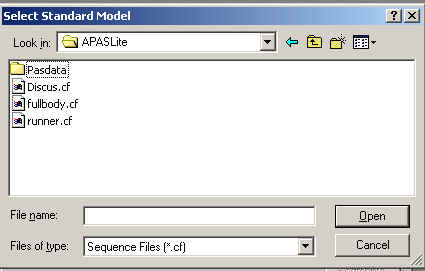
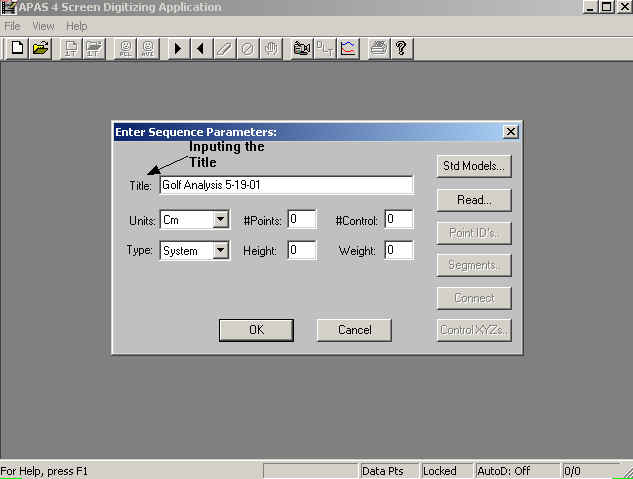
Figure 4. Sequence Parameters You need to input the Title, the Units, the number of points to be digitized, the number of Control Points. Weather it is normal sequence including a standard joint connections or "User Defined", any set of points to be define by the investigator. The Height of the person and his/her weight. In addition, you can use a Standard Model as a template to many activities such as jumping, running, throwing and so on. After you analyze an activity, lets say high jump, you may save the .cf file created as a template and then anytime you need to analyze high jumping just call the template in the "std Models" and you will not need to input the Units, #points, #control points, and type. However if the person height and weight is difference, which is probably is, then you need to input these corrected figures. Also, if the calibration frame is different you will need to input the coordinates again. But, if the calibration frame is the same, you will not need to. Please refer to our Digitize Manual to learn how to create a new sequence file. Figure 4a. shows some of the available "models" that come standard with APAS/Lite:
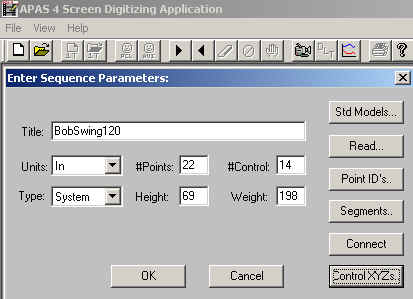
Figure 4a. Models for templates input After input the proper information, Figure 5 shows the results:
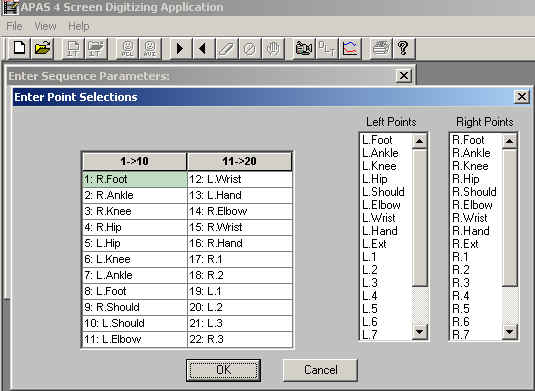
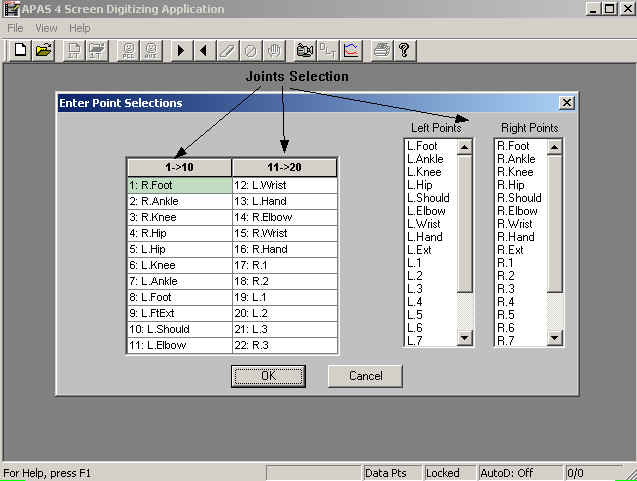
Figure 5. Sequence Parameters selected Looking at the #Points, Figure 6 shows the selected points to digitize:
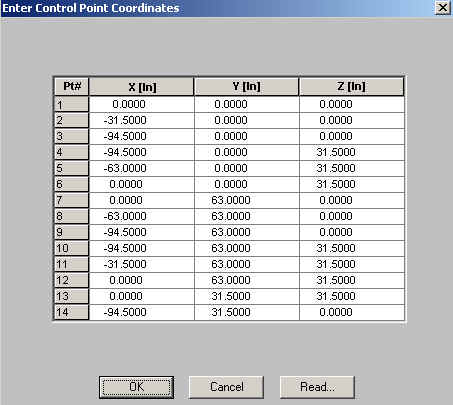
Figure 6. Points ID selections. After inputting the Control Points, the data looks as in Figure 7.
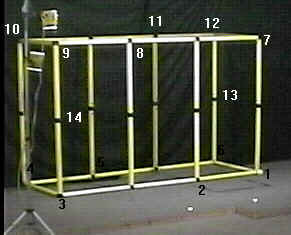
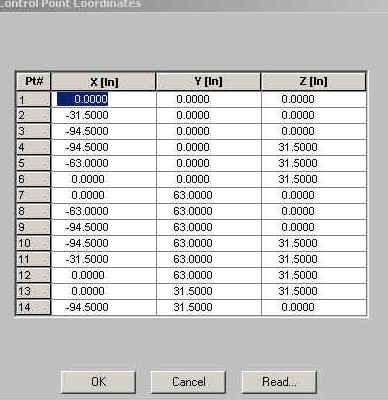
Figure 7. Control Points One must be very accurate in measuring the Calibration Frame in the view of the cameras. Any small error here will results in measurement error and erroneous results. Every view, or camera needs to have a video image of the calibration frame in order to calibrate the view for the transformation process which create the 3D or 2D files. The next two figures show the Calibration Frame video frame and the associated measurement associates with each point which was digitized for the present demonstration.
Figure 8. Typical Calibration Frame.
Figure 9. Measurements of the coordinates associated with the the Calibration Frame You can use any shape of calibration frame and choose any number of points. The minimum number points for 2D analysis are 4 planar points. The minimum for 3D analysis you require to have at least 6 none co-planar points. Ideally, the calibration frame cover most the field of view. However, this is not a requirement. Some companies will try to sell you elaborate Calibration Frame configuration just to be able to charge you more money. Don't fall into this trap. Just make your own calibration frame exactly square and with standard measurement. Peak will sell you calibration frame for over $1000 and it cost them to make $25. What a steal and un-necessary. The next video will show step by step the material covered to this point. All videos are highly compressed and do not represent the true video quality. When one use video cameras the digitizing files are presented in much better resolution. You may stop the video with the Media Player and advance it frame by frame to see all the steps up to this point. shows all the steps to be able to load two simultaneously videos to APAS/Lite video screen to be ready for digitizing. Next Video present all the steps to the digitizing process To Summarize this lesson1. You select APAS/Lite Icon as shown in the next Figure:
2. You Open the File Menu and select a new project as shown in the next Figure:
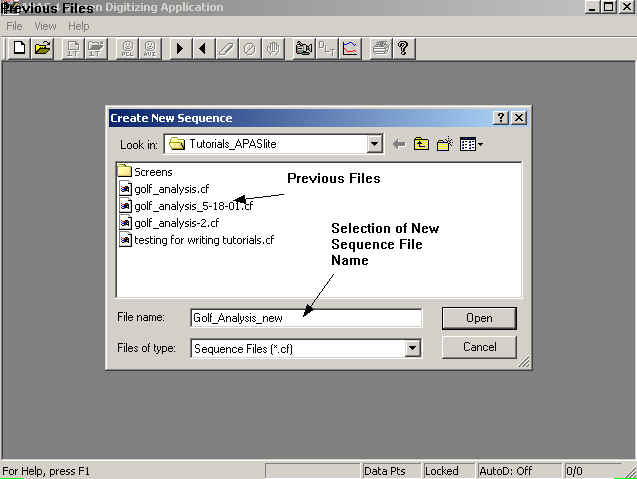
3. You define the new file. This is the .cf extension file as shown in the next Figure:
4. Then, you input the Sequence Information such as the joints you are going to digitize, and the Calibration Frame Coordinates as shown in the next Figure:
5. Next Figure show the Point ID's for this particular project:
6. The next Figure illustrates the Coordinates of the particular calibration frame:
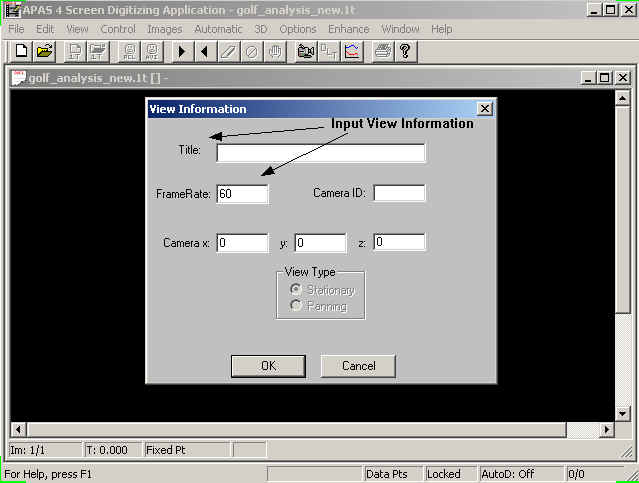
7. In the next Figure you shown the menu for selecting the view. Each camera is associated with a new view. You must input the Frame Rate for this camera. The Camera ID and the Camera location on the x, y, and z coordinates are not required.
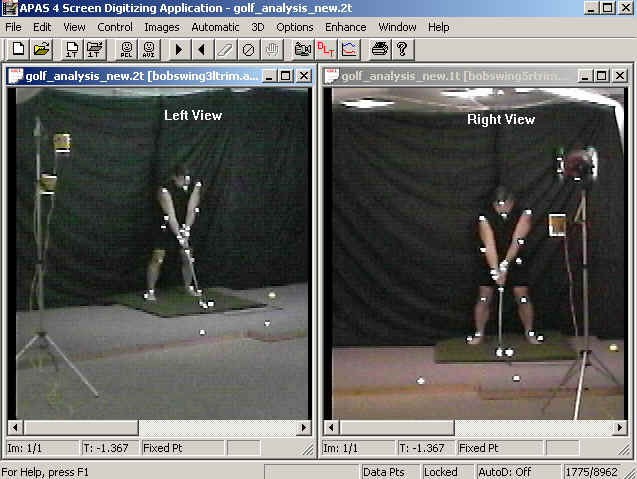
8. After selecting the View and its associated video file you see the next Figure:
9. You may select another view to be able to digitize two views simultaneously. (With the regular APAS you may digitize up to 4 view simultaneously).
In the next lesson we will cover the actual digitizing process. A comprehensive description of all the steps described so far are available here.
|
|
|


