|
|
Operation |
[FrontPage Include Component] |
|
|
|
|
|
|||||
|
NAVIGATOR: Back - Home > Adi > Services > Support > Manuals > Apas > 3Dkin : |
|||||
|
|
|||||
| |||||||||||||||||||
|
Operation
Categories
|
How to use the 3Dkin program The 3Dkin program uses anthropometric measurement to personalize subject variability in the calculation of segment mass, CM, weight, inertia. The values must be inserted in the main window of the program. The anthropometric measurements must be input in units of meters.
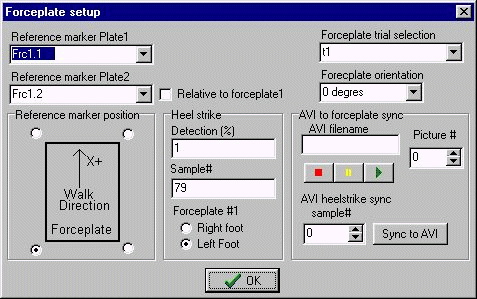
The forceplate setup is used to adjust
the program identification on forceplate orientation, reference marker position, heel
strike detection, and synchronization to video.
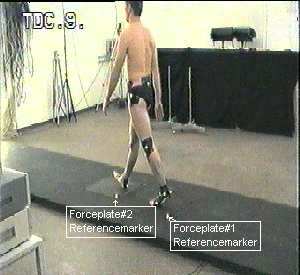
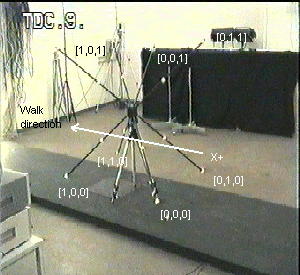
Reference marker To identify the forceplate with respect to global reference frame (coordinate system) a reference marker must be placed on the first forceplate. The position of a second forceplate can be accomplished through a second reference marker or by using the information (X and Y distance from forceplate # 1) provided in the analog file (.ANA). The following example illustrates the use of two reference markers.
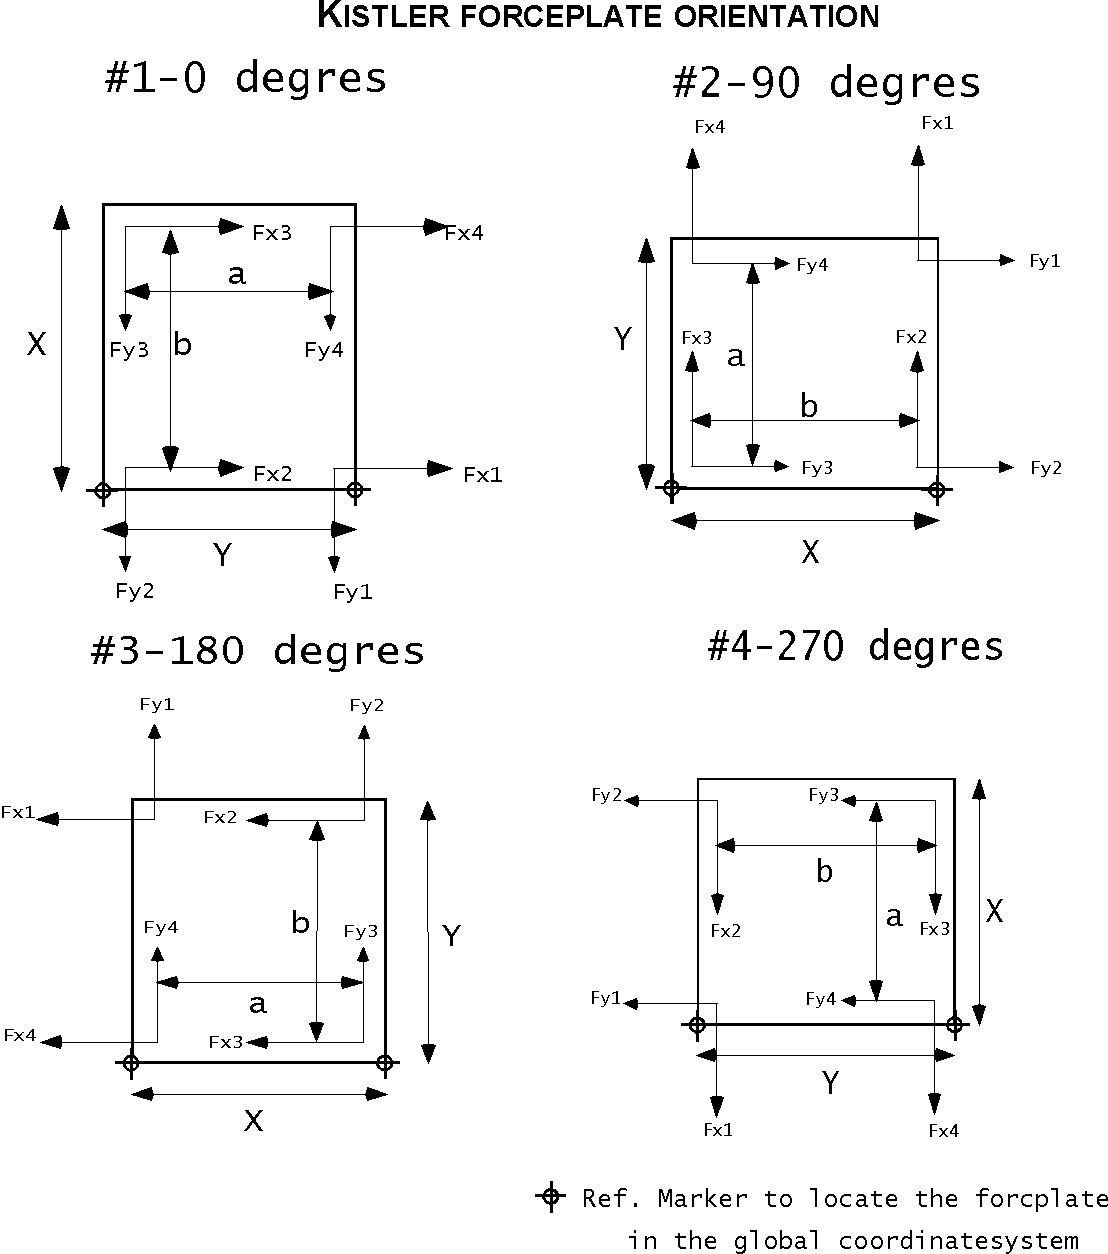
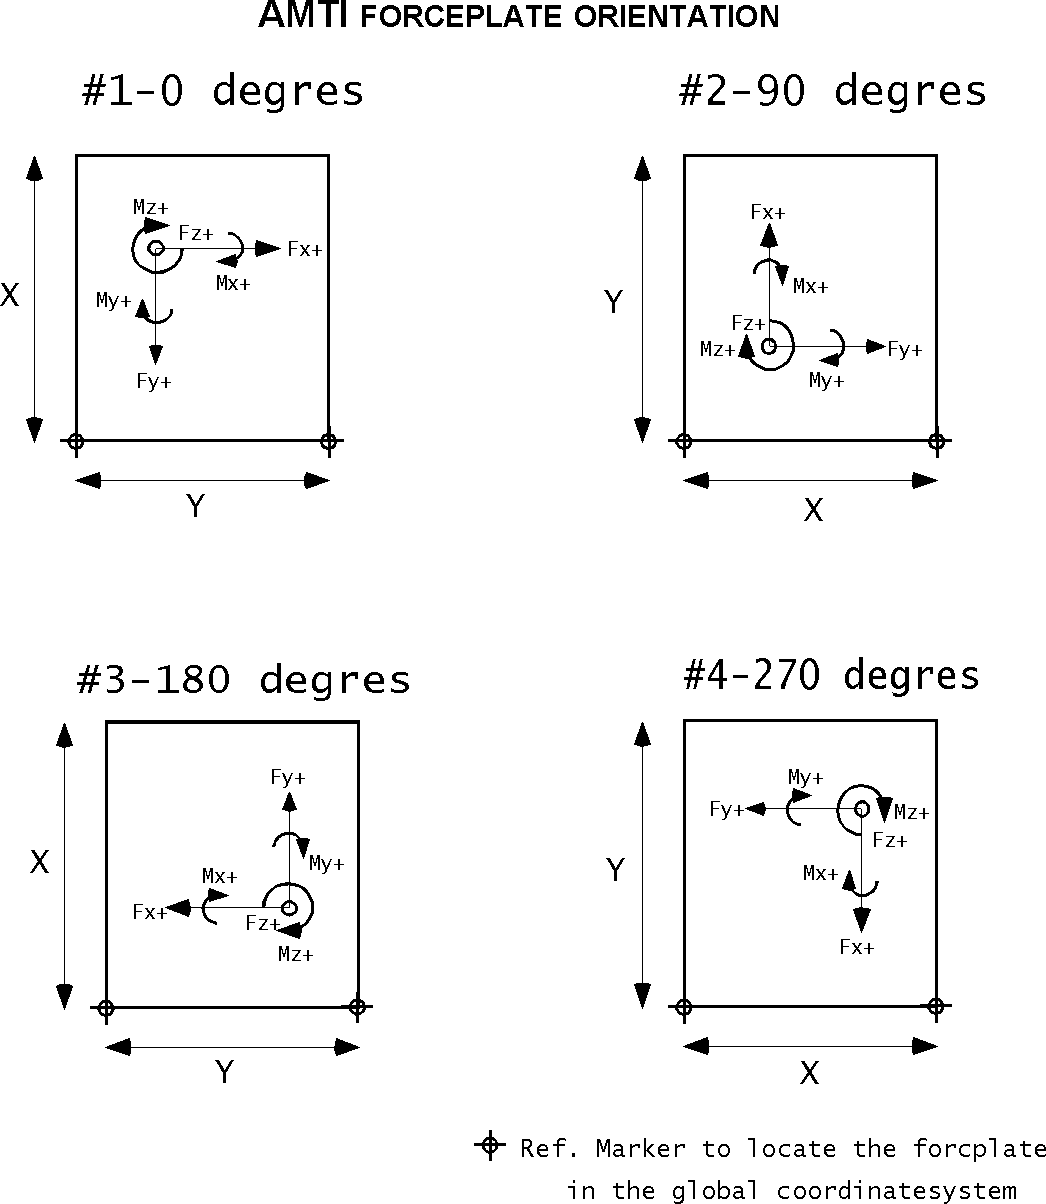
Trial selection This option is used to specify the trial # within the analog file (.ANA) to use for the calculations. Reference marker position This option is used to define the position of the reference maker placed on the forceplate indicating the position relative to subject. Forceplate orientation The forceplate can be orientated with respect to the calibration frame/cube in four different ways (0, 90, 180, 270 degres). Two brands of forceplates are currently supported.
Heel strike detection The heel strike detection is used for two purposes, filtering of forceplate data from noise and to synchronize video to forceplate data. The synchronization is only used if no hardware synchronization is used. Double click the AVI filename box and use the file open dialog to find the video source. Move the video frame position to where heel strike occurs. Click the synch to video button to synchronize the video and forceplate data. Synchronize video to forceplate data In experimental setup where forceplate
and video is desynchronized it is possible to adjust digitized video to the forceplate
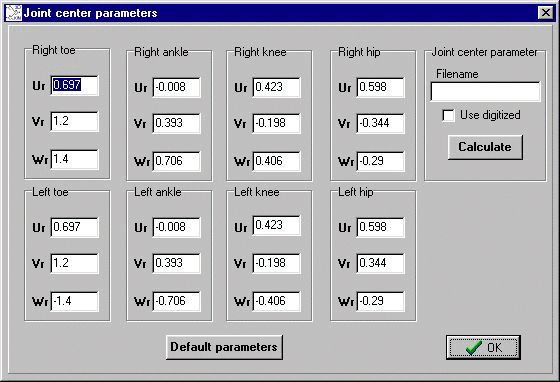
analog file (.ANA). The joint center parameter setup is used to adjust the parameters for joint center calculation (Uv,Uw,Uu) to individually fit the subject. It is possible to use four different methods to estimate the parameters:
To setup the joint center parameters
first bring up the Joint center setup window by using the
Default values (Vaughan et al.) These values are estimated using stereo X-ray. The values are obtained from Vaughan et al. If the parameters have been changed and the default values must be inserted press the button Default values. Custom values If the joint center parameters are calculated from stereo X-ray or MRI the values just have to be entered in the boxes representing the parameter. Calculate parameters from digitized joint centers This option is used if the program must estimate the parameters from digitized joint centers. A seperate APAS 3D file must be supplied containing the digitized joint centers. Double click the Filename information box and use the fileopen dialog to find the 3D file. After the file is found clicking the calculate will estimate the parameters. Using digitized joint centers This option is used when the joint center is not to be calculated from external markers and standard parameters but directly digitized. Double click the Filename information box
and used the fileopen dialog to find the 3D file. Click the Use digitized JC check
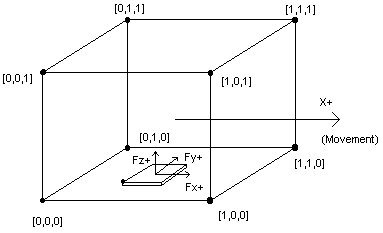
box. Exit the setup clicking the OK button. When calculating the forceplate relative to the body motion it is important establish and input the direction of the calibration frame Z+ to the 3Dkin program. The direction of X is always considered positive for the direction of motion and the Y positive is always directed upward. The Z axis can be defined with respect to direction of movement (Z+ right or left). The calibration frame setup can be difficult to understand but the following example will illustrate a calibration frame with Z positive directed left with respect to movement progrssion.
Example on calibration frame configuration with Z+
directed to the right When calculating resultant joint forces and moments a lot of information is given. The amount of information stored on disk can be adjusted to minimize the totl amount of data stored on disk. To select what part of the calculations that must be saved to disk first select the Output parameters option in the Preferences part of the main menu.
Use the individual check boxes of the dialog to select or de-select the output option. After the choice has been made click the OK button. The following picture illustrates how to configure the program to save the Joint moments, joint angles, euler angles. Input of kinematic and forceplate data The program must be supplied with a APAS 3D marker trajectory file and a APAS analog (.ANA) file with forceplate data. Remember that all files used with the 3Dkin module must be filtered using the Filtering Module Double click Kinematic file information
box and used the fileopen dialog box to find and enter the file. The same procedure is
used for entering the kinetic file The calculation of resultant joint forces and moments is initiated by clicking the one of the three speed buttons.
After the enviroment is configured the parameters can be stored in a special project file. This file can be used to log the configuration of the current calculation or later to recalculate with new parameters. The project files will be save with the extention .akp (APAS Kinetic Project).
|
|
|