KINETICS MODULE
13.0 KINETICS - GENERAL DESCRIPTION
In the KINETICS module it is assumed that each body segment can be described as a rod having three properties, length, location of CM, & radius of gyration. The segments have length only, moments about the segment axis are zero.
The body is assumed to be a series of segments linked together which extend from the body trunk to a free end. For example, an arm is such a series of linked segments extending from shoulder to hand.
So the body consists of the trunk and four link systems [2 arm & 2 leg]. It is assumed that only the feet can contact the ground and that all other forces acting on the body are known.
We assume that at each joint where 2 segments join there is a force and a couple acting, with these acting equal and opposite on the two segments. The force A exerts on B is equal & opposite to the force B exerts on A. The forces/couples at each end must produce the observed motion of the segment. So for each segment at each end we have 3 components of force and 3 components of couple which we wish to calculate, 12 unknowns. The equations of motion for the segment are 3 for force and 3 for torque, giving 6 equations.
Since we have 6 equations with 12 unknowns we cannot outright solve the system of equations. However, if we start at a free end of our link system, the 6 quantities of force/torque are zero and we can solve for the 6 force/torque values at the other end of the segment using our 6 equations. We assume that the force/torque values on the attaching member are equal & opposite to the 6 values just calculated so we can solve for the 6 force/torque values for the 2nd segment 2nd end using its 6 equations of motion. We proceed up the link chain in this manner until we reach the trunk. External forces for each segment simply add in to the equation of motion for the segment involved.
In this manner, values for force/torque are calculated at each joint for all the link chains with a free end. In the case where only one leg is in contact with the ground, the ground contact force is calculated
from the observed motion of the center of mass. The sum of forces acting on the body is the force of gravity, the ground contact force, and any external forces. The sum of these forces must produce the observed motion for the center of mass as described by its equations of motion. We then work up the link chain as before. For ground contact it is assumed that no couple exists [just as with COP calculation using a force plate].
In the case where both feet contact the ground, the vertical components of force at ground contact are calculated by observing rotation of the whole body about it's center of mass. The two contacts produce a torque which produce the observed motion. The total horizontal force produced by the sum of the ground contact forces can be calculated but how the total is partitioned between the two contact points cannot be calculated. We assume that F[hor]/F[vert] for the two feet is the same.
13.1 KINETIC PROCESS
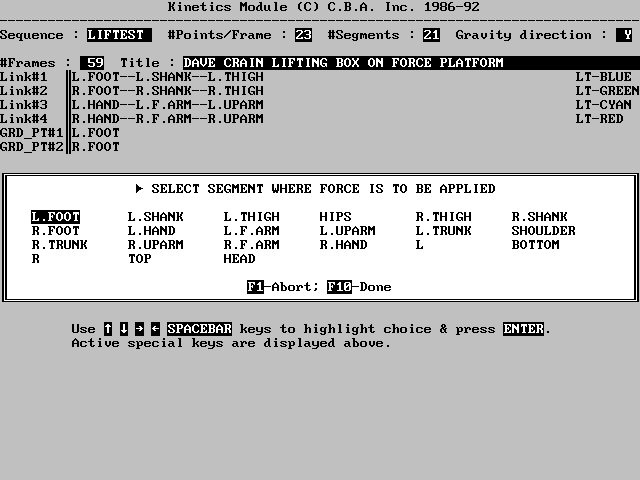
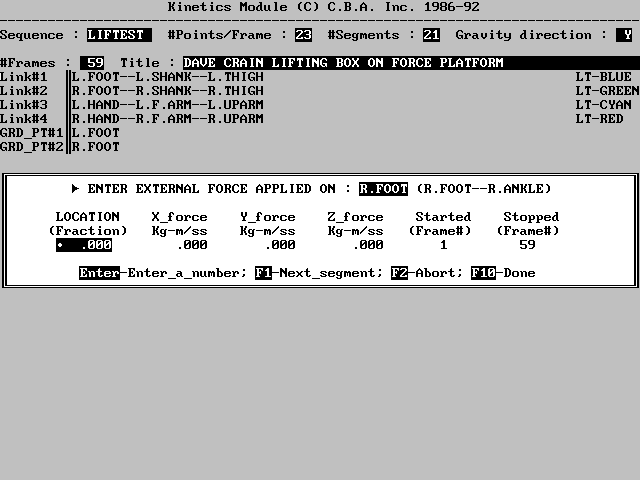
The Kinetics Module is provided for measurement and analysis of the external forces that are applied to the body during movement. External forces include anything external to the body that is applying force or resistance as is in movement. The calculation that are performed are made against the force distribution to the body.
The Kinetics Module is used in conjunction with the Graphing Module. Once the kinetics analysis and calculations have been performed then the Graph Module is used to produce a graph with all external forces.
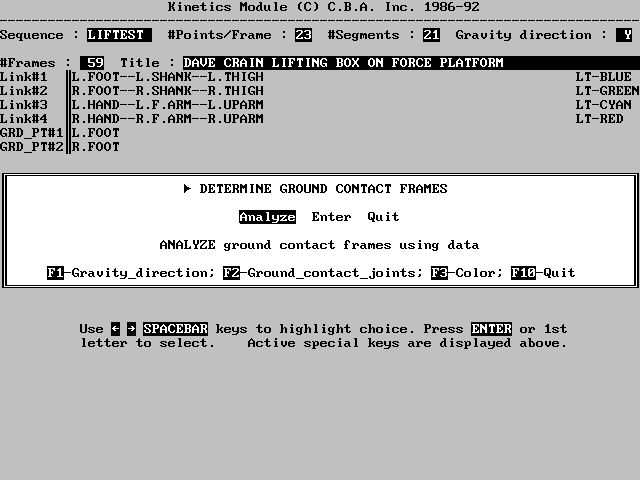
After selecting the Kinetics Module, the first screen provides a list of sequences to analyze. Once a sequence is chosen, the table at the top of the screen is filled with the
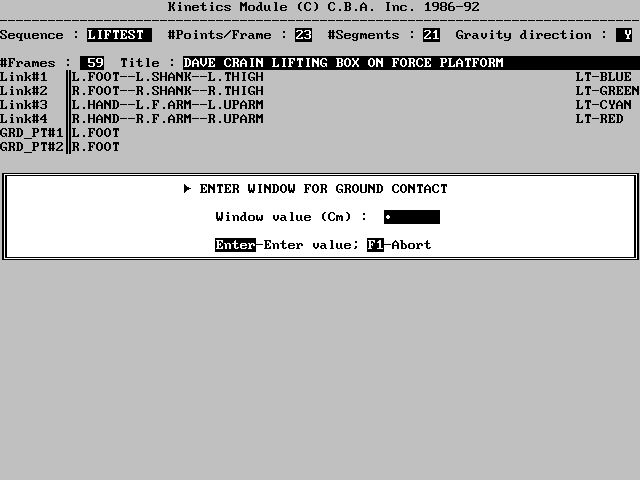
The function key F1-Gravity_Direction may be used to change the direction of gravitational force along any of the X,Y,Z axes. The default setting for gravitational force is the Y axis. The F2-Ground_Contact_Joints key is used to select the ground contact points for the sequence. F3-Color may be used to change the color of the stick figure, background, or logo.
Each time a body segment is completed press F10-Done and the next segment will appear. When all segments are complete the F1-Next_Segment key is pressed to return to the previous menu and the F10-Done key is again pressed to enter all of the calculations. The system will then prompt that computation is on progress. Once the computations are done, the Graphing Module may be used to generate a graph of the calculations for the segments.
