Lesson 1
The RealCap Module
By
Gideon Ariel, Ph.D.
![]()

The RealCap (Real time capturing) uses a new and improved technology to provide real-time video capturing with the PC. The software and the associated hardware removes the use of expensive VCR equipment using advanced field by field stepping. This allow 60hz video capturing from any video camera, and alow capturing in any speed when high speed cameras are used in conjunction with compatible VCR. As long as any high speed camera enable to store data in NTSC or PAL, the RealCap is compatible. For more information about video essentials please click here.
Introduction To The RealCap Module
Capturing a video sequence utilizing the full speed provided with today's video standard (50Hz in Pal and 60Hz in NTSC) it is normally required to use special VCR equipment with field by field stepping capabilities. Using this software module it is possible to capture video sequences from a VCR or camcorder directly to the computer hard drive without special requirement of expensive VCR equipment. However, any VCR can be used also as a video source as an option. This allow also to capture video at higher speed up to 4000 Hz, for example, depending on the camera capability.
The RealCap module is an easy to use module that can make use of external computer controlled VCR equipment synchronizing the video capturing process.
To enable synchronization between different views and to minimize the disk usage it is possible to trim the captured video sequence.
Essential Functions In RealCap
A few of the features you will see in RealCap are:
- Remote control of VCR equipment. (But you can use any VCR with no computer control)
- Real-Time Video Capture. Video can be captured directly from the video source at rates up to 60/50 images per second. (Or, faster, utilizing high speed cameras)
- Trimming of the video sequence for synchronization between views.
- Direct control of video capture hardware.
- Utilizing LanC to control the camcorder Directly.
System Requirements
The following
provides the basic guidelines for required hardware to provide the best possible
performance. Required software includes Microsoft Windows 95 or 98 or Microsoft NT.
Following Video capture vendors have hardware that conforms with the requirements of the
RealCap software module.
_____________________________________________________
Iomega (www.iomega.com)
Matrox (http://www.matrox.com/)
Miro (www.miro.com)
TrueVision (www.truevision.com)
There are many companies
on the market for this purpose but at various prices. The most inexpensive solution is the
Ioemga Buz.
However, for best price comparison you can link to the following URL: http://www.pricewatch.com/ which is an entire web
site dedicated to price comparison and a great resource before you buy anything in the
computer World.
Important: Please make sure that you have the latest version of the hardware drivers installed. Check out the hardware vendors web site for driver updates. Sometimes, older computers cannot handle the data rate for real time capturing.
Important for choosing the hardware is that it supports capturing in true fields (60/50 fields/sec) and not only frames (30/25 frames/sec). If you have trouble on the purchase of this hardware please contact ADI.
When streaming Video data directly to the hard drive it is important that the PC data bus and the hard drive is capable of moving the data from the video capture hardware onto the hard disk itself.
When streaming video directly to the hard drive, the computer will have to store more than (720*480*24 bit/color*30 frames/sec) 27Mb/sec), when the video image is not compressed. Without compression there are only few systems that can handle this amount of data and therefor video compression is used. The RealCap module uses hardware that has Motion JPEG image hardware compression which also complies with the above hardware vendors. After capturing the 30/25 frames per second, it is the unique APAS system that allow separation of each frame to its two fields components. This how the yield is 60/50 fields per second.
The recommended computer setup:
Intel Pentium (or
similar processor from AMD or Cyrix) 166Mhz or faster. Today you should prefer the
Pentium III at 500Mhz, or the AMD KII at 450Mhz.
Ultra DMA hard drive (2-3Gb min) or Wide SCSI or faster SCSI hard drive It is
recommended that you will purchase at least 10GB hard disk.
64Mb of memory or more. It is recommended to be 256MB RAM.
Video graphics card with DirectX capability.
Monitor in a resolution where it is capable of a refresh rate of more than 50Hz in
PAL mode and more than 60Hz in NTSC.
There has been some trouble when installing the Iomega Buz in older computers which the PCI bus is not of the new standard. To make the Buz work with the PCI bus, you must have at least version 2.0 or later. Please check with the hardware vendor or us at ADI for further information on the purchase and installation of video capture hardware.
 Iomega Hardware compatibility!
(Discontinued, we changing to the Matrox Marvel G200-TV)
Iomega Hardware compatibility!
(Discontinued, we changing to the Matrox Marvel G200-TV)
When previewing online video from the VCR or camera it is optimal that the video graphics card can display in overlay mode. Overlay mode is a very fast direct video memory access for video capture hardware using DirectX technology. This feature is not absolutely necessary but enables you to use the PC monitor directly as a viewfinder.
VCR equipment
The current supported
VCR equipment is Panasonic AG-5700, Panasonic AG-7350 and the modified Panasonic AG-2550C
with BCD-control. However, remember, you do not need any VCR. You can capture
directly from any video camera, directly in real time.
Also, any video source can work. The only difference is that
you will not be able to control the VCR from the computer. But, this is not a problem. You
can control any VCR with the remote control provided or manually by pushing the control
buttons. With real time streaming you can always start a little early and finish the
capturing late, so you do not loose any data. Then latter, you trim and synchronize the
cameras views. This will be demonstrated with a video file included in this tutorials.
To Start The RealCap Module 1. Double-click the RealCap
icon located in the APAS window group. 2. Click Start in the navigation bar and under the Program files you find a APAS system submenu where the RealCap program can be started.
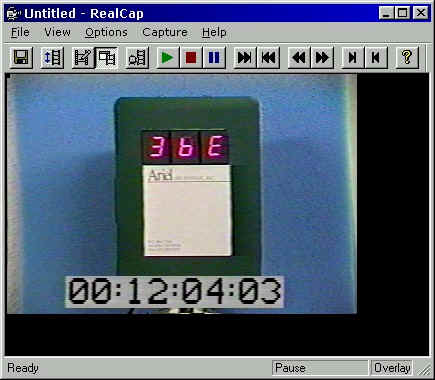
RealCap main screen |
The following Video File
(.AVI)![]() (1.4MB) illustrates the steps to get to the RealCap Module. (You
may download the file first to your hard disk and then open it with the MS Media Player
and advance it frame at the time to follow the text, or just play it. The quality is not
superb since high level of compression was made in creating this file in order to keep the
file size to a minimum).
(1.4MB) illustrates the steps to get to the RealCap Module. (You
may download the file first to your hard disk and then open it with the MS Media Player
and advance it frame at the time to follow the text, or just play it. The quality is not
superb since high level of compression was made in creating this file in order to keep the
file size to a minimum).
To view the video frame by frame you can set your mediaplayer to the
Microsoft Media Player and set it to frames. This will allow you to advance frame by
frame. (The new MS Media Player does not let you advance frame by frame and just play it.
I suggest for you to run the old MS media player which enable you to control the video
advance, frame by frame). The video file Realcap0002.avi![]() (2.3
MB) illustrates the capturing process of a gait sequence in more detail.
(2.3
MB) illustrates the capturing process of a gait sequence in more detail.
Normally you do not have to go through all the steps, as you will see later. However, the
video illustrates the various options that will be explained in detail latter.
The capturing process start with the selection of the type of video input and the time for capturing. In the above sequence it was set to 5 seconds which means a capturing of 5 x 60 fields per second or 300 fields as raw data of video. As one can see the compression allowed this 300 full frames to ocupied only 2.3 MB of hard disk storage space.
SCREEN LAYOUT
Prior to beginning the Capturing process, you should familiarize yourself with the screen layouts of the various Capturing menus. Many functions can be selected using the RealCap Tool Bar or by selecting the appropriate command from the Pull-Down Menus.
.jpg)
THE RealCap TOOL BAR
You can activate many functions by selecting the icons located on the RealCap program tool bar. The tool bar is located near the top of the window. Icons are pictorial representations of commands or functions. You can access the following commands by clicking the appropriate icon.
![]()
From the left to right the buttons are
Save As.. | |
Trim Video... | |
Preview mode (Only use with older technologies) | |
Overlay mode (Should always used when possible) | |
Capture video sequence (Capture the sequence according the Preferences selected before) | |
VCR - Play (You need a serial interface for the VCR to allow these functions. Otherwise, just use the remote control or the VCR Buttons) | |
VCR - STOP | |
VCR - PAUSE | |
VCR - Forward the tape | |
VCR - Rewind the tape | |
VCR - Speed Search forward | |
VCR - Speed search rewind | |
VCR - Step 1 image forward | |
VCR - Step 1 image backward | |
About |
THE STATUS BAR
The status bar provides useful information about the current status of the image file. The status bar is located at the bottom of the RealCap window. The far left side of the status bar is divided into two separate fields; VCR status field and the Video capture display mode.
![]()
Lesson 1, introduced you to the basic functions of running the RealCap module and capturing video. You should run the RealCap module and get familiar with all the functions that were discussed above. Lesson 2 will actually guide you to capturing video principles.
[Go to Lesson 2] [Go to the top] [Go to Home
Page  ]
]